For those not familiar with exactly what Schema.org structured data is and why it has become an essential part of any SEO strategy, please read my article “How to use Schema.org structured data for companies and people“.
And what about Wordpress and Yoast?
Well, 37% of the entire internet is currently powered by Wordpress. Yes. That’s about half a billion sites that are running some version of Wordpress, and just the latest version (5.4 at time of publishing) has been downloaded 31 million times!
What is Yoast SEO and why is it useful for Schema.org data?
Yoast SEO is a Wordpress plugin started in 2010 by Joost de Valk and has been downloaded more than 202 million times. It simplifies and automates some basic (and more advanced) on-page SEO tasks.
The functions handling Schema.org markup were initially added in 2011, and then, in May 2020, a huge code rewrite was rolled out with an entire API aimed at allowing developers to inject data into their Schema @graph. This was great news, but most people in SEO working with Wordpress are either not aware of its existence or haven’t looked at how to use it. And it’s actually incredibly simple to get started!
So let’s have a look at what the Yoast Schema output looks like in a wordpress page. Here is the basic container block:
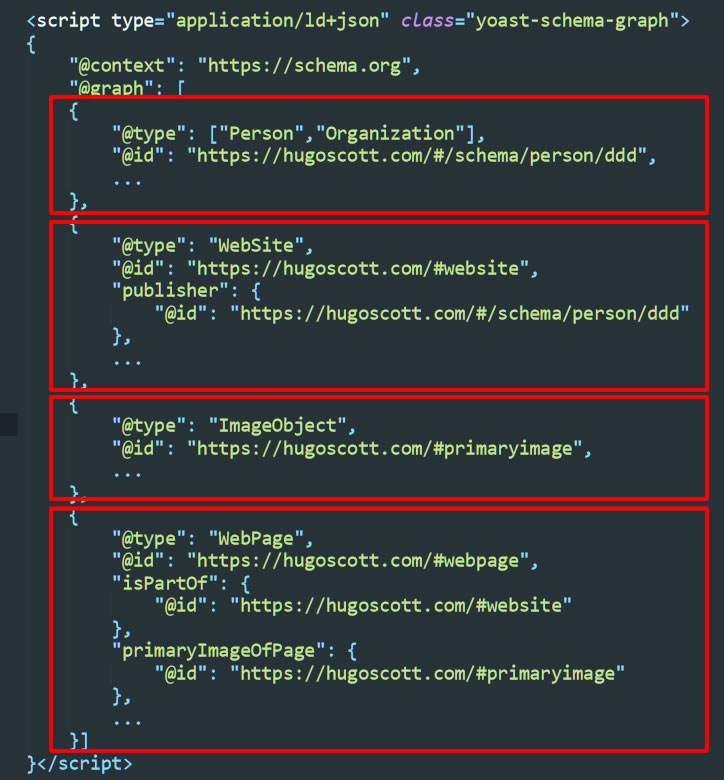
As you can see, what is interesting here is that the Schema data is split up into 4 main pieces ( eg @type : Person/Organization etc) that are all at the same level in a container called @graph. I have removed all the data except the @type, the @id and any properties used to link the pieces, to show you how it all fits together.
Schema blocks on websites often have elements nested inside each other with, for example, the code for the primaryImageOfPage image object inside the WebPage block, whereas here it’s a whole separate piece. This is because nesting blocks within blocks can quickly get very unwieldy with a lot of repeated code.
Here, the pieces are all linked using the @id of each piece, so the blocks in the image above are linked like this: ImageObject is the primaryImage of WebPage which isPartOf the WebSite of which the publisher is the Person/Organization block. That is clear and logical!
To cut a long story short, the API basically allows us to “stitch in” new pieces and refer to them from any other piece via the @id.
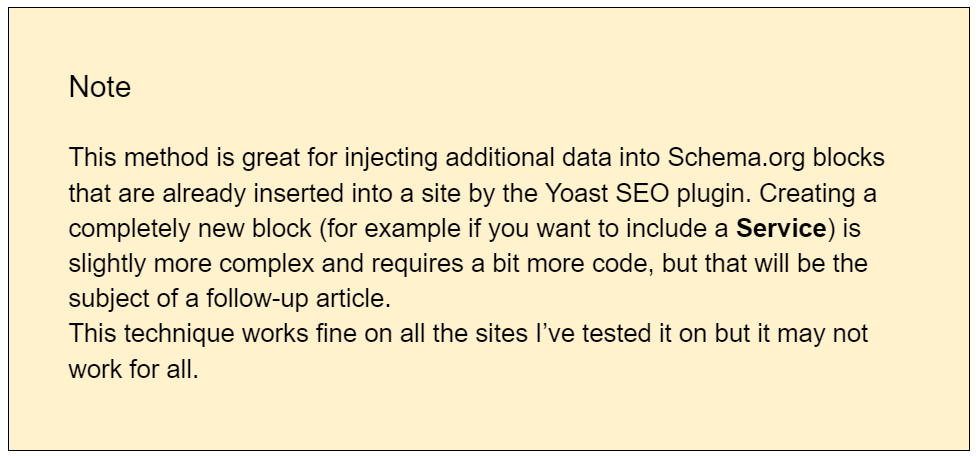
However, stitching in new pieces that are not already being generated requires quite a bit more code and setting up conditions to decide which page types need the new pieces, so rather than look at how to do that here we’re going to simply look at how to change the data in an existing piece (look at which pieces are already being output into your page) either by changing one of the values or by inserting new types and properties.
To do this we’re going to create an ultra-basic Wordpress plugin.
But first, you may be wondering: why do we want to do this?
Why add data into the Yoast SEO plugin Schema ?
The plugin’s architecture has been well thought out and is designed to work in the largest percentage of cases. It provides classes that trigger automatically for a wide range of content types if the right conditions are met.
The documentation tells us that the types it will currently output are Organization, WebSite, WebPage, Breadcrumb, Site search (SearchAction), Person, Product, Offer, Aggregate Offer (AggregateOffer), Article, How to (HowTo), Question, Review, Comment, Image (ImageObject), Video (videoObject), Local business (localBusiness) & Address (PostalAddress). And there are several extensions that you can add on for more specific uses such as if you are using WooCommerce.
This is all wonderful, but when you look at the output for the Person type you can see that only the most basic essential data is in there:
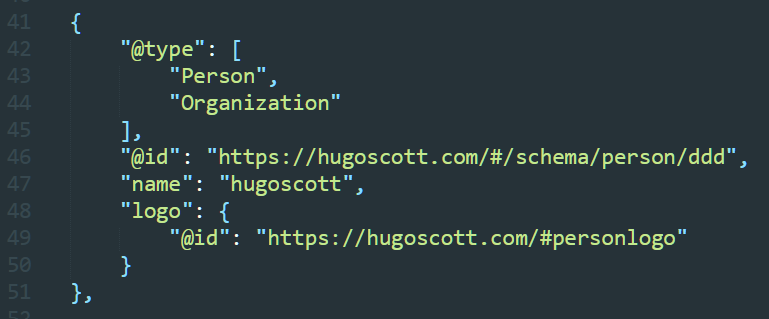
(note : I have shortened the @id generated by the plugin)
If you read my previous article about Schema.org markup for Person and Organization and why it is excellent for improving the “E-A-T” of your site you will have read about how you can use a host of properties for these types, some of which will identify you more precisely and provide links to data showing your expertise and authority.
For example, you may want to add an alumniOf property to talk about a person’s education or a knowsAbout property to give some details of their field(s) of expertise. For a company you may want to provide the official company registration number in the form of an identifier.
We’re going to do this in two simple steps:
- Create an ultra-basic 1-file Wordpress plugin
- Start adding in the data we want to output via the Yoast Schema API
Why make a plugin?
While it is possible to just plonk the code into the functions.php file of your child theme, putting it in a simple plugin is the recommended path for the simple reason that if there are any problems with the code you can simply deactivate your custom plugin and the site will default back the core Schema output by the Yoast SEO plugin. Also, if you put it in the child theme and the files are ever changed you could lose all the precious Schema data you spent hours compiling!
Request your custom demo
How to create an ultra-basic Wordpress plugin
This couldn’t be simpler!
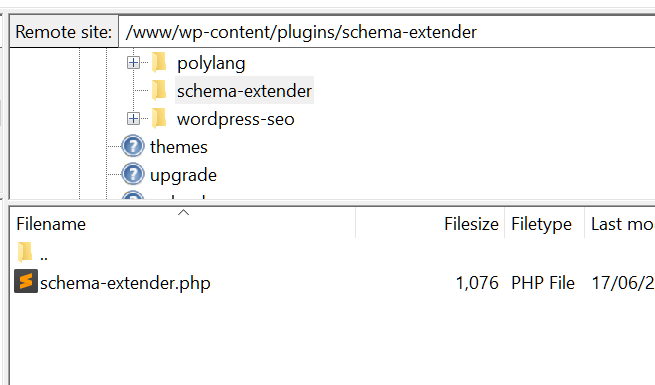
To make a functional plugin you simply need to create a new PHP file – I’ve called it schema-extender.php – and save it in a new folder with the same name, like this:
Then you need to put some information in the the top of schema-extender.php like this :
<?php
/**
* Plugin Name: Yoast Schema Extender Simple Version 2
* Plugin URI: https://hugoscott.com/
* Description: A very basic plugin to extend Yoast Schema.org data.
* Version: 1.0
* Author: Hugo Scott
* Author URI: https://hugoscott.com/
**/
If you save this and upload the folder and file to the /wp-content/plugins/ directory of your wordpress site you will see it displayed in the list of plugins like this :

You can activate the plugin but it won’t do anything yet as we haven’t added any functions – that is the next step!
The first line of code I put in is not essential but it will display the schema data in a more readable format than the default minified output, and you can always remove this line later:
add_filter( ‘yoast_seo_development_mode’, ‘__return_true’ );

Now we’re going to add a Wordpress filter that will add a custom function example_change_person (which we’ll write next) to the Yoast process :
add_filter( ‘wpseo_schema_person’, ‘example_change_person’ );

And then, to finish up, we’ll write the very simple function example_change_person() that is called by the filter and will add the pieces of data:
function example_change_person( $data ) {
// data
return $data;
}

If you save this and upload the file to the server you still won’t see any difference in the Schema output because we haven’t added any data yet to the $data array. For those not familiar with the term “array” it just means a sort of “box” containing a structured set of bits of data that are pairs with a “value” and a name (the “key”).
And this is exactly the same way that schema.org markup works. It is composed of pairs with a name and a value, for example here is the url data for the WebSite in the schema output :
“url”: “https://hugoscott.com/”,
Here the name (or “key”) is “url” and the value is “https://hugoscott.com/”.
Each key in the $data array is used for the property name, so be sure to spell it correctly.
If we wanted to add the above data into the $data array we would simply add the line into the function like this
$data[‘url’] = “https://hugoscott.com/”;

However, for the Person piece we wanted to add a knowsAbout property, so let’s add that instead :
$data[‘knowsAbout’] = “https://en.wikipedia.org/wiki/Balti_(food)”;

Save the file, upload it to the server, reload the page and look at the source html (or check it in the Google Structured Data Testing Tool) and you will see this :
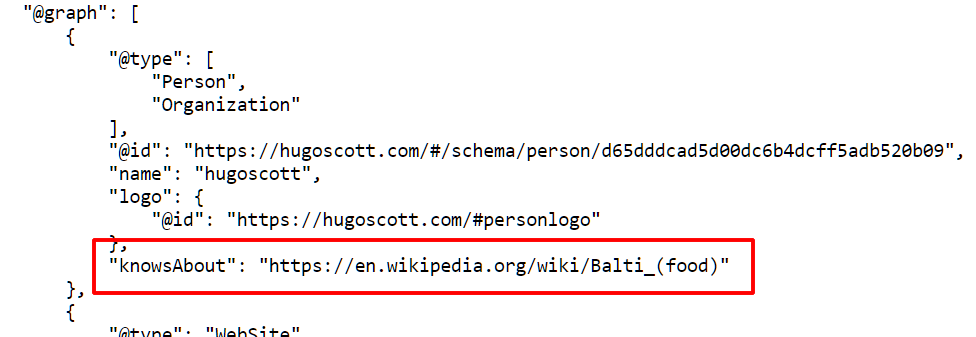
How about that! We’ve added a bit of data and it really wasn’t too tricky. This is fantastic, but what do we do if we want to add alumniOf which isn’t just a simple text string but a sub-block?
The great thing about the way that the Yoast plugin deals with the $data array is that instead of a text string we can include a sub-array and it is output as a Schema sub-block!
Imagine we wanted to do this:

You can add this data as a sub-array like this:

If the Person in question had several diplomas and you wanted several AlumniOf sub-blocks, just add them in like this:
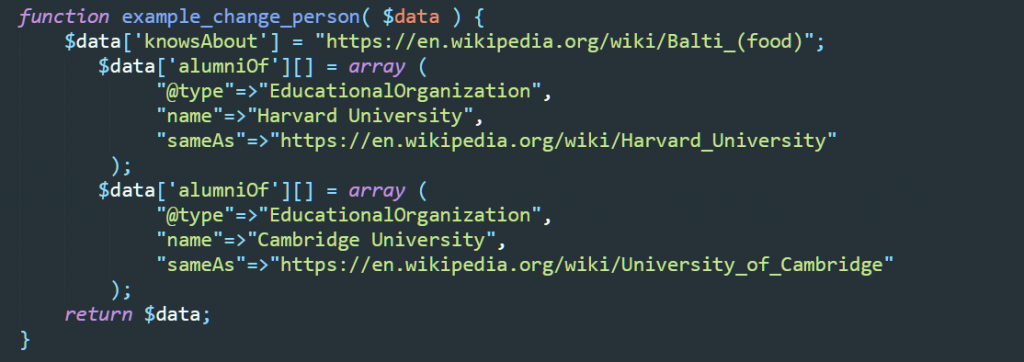
And it will be displayed like this:

It couldn’t get simpler than that!
A final word
Thanks for reading this article. It has only skimmed the surface of what is possible with the Yoast SEO API.
The examples I have given are great as standalone data bits for Person and Organization but if you want to take it further – for example with template pages – you can add forms to your plugin and save the data to a custom database table and then compile the Schema in your theme template file and output it in the footer of your page. All of this is possible, and you can use the @id property to link any Schema output in the footer to the Schema output in the header!
The Yoast SEO plugin API will evolve considerably in the near future so be sure to keep an eye on their latest developments.
Come to my site for more information or if you want to hire me to do this for you.
Thanks
As a final final word I’d like to thank Jono Alderson at Yoast for taking the time to answer my questions!

