There are several different reasons why you will most likely have to go through a domain name migration, or simply, a domain migration. These can include moving from one domain name to another, combining several websites into one, or simply moving your website from HTTP to HTTPs, which is more common. Domain migrations don’t have to be difficult. But, if they’re not done properly, they can have serious consequences, like a loss of traffic or loss of search engine rankings, which can mean a loss of sales.
Migrating from HTTP to HTTPs
Note: Bill has separated this article in different videos summarizing his points.
The most common type of migration is when you move your site from a non-secure website to a secure website. Your website URLs move from HTTP to HTTPs URLs. If you haven’t done this type of migration before, I recommend that you highly consider moving to a secure website. The search engines consider HTTPs a search engine ranking factor, and the latest versions of web browsers like Google Chrome and Firefox have begun warning users when they visit a non-secure website.
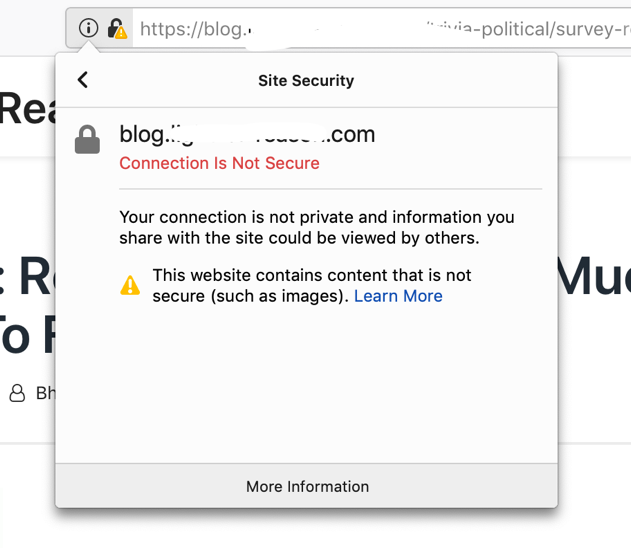
Example of the warning Firefox shows when visiting a web page loading HTTP resources on an HTTPs URL.
Migrating your website from HTTP to HTTPs involves several important steps. These steps include installing the SSL certificate on the website and then making sure that the website has been completely migrated:
- Purchase an SSL certificate and install the certificate on your website. Many web hosts will sell you the SSL certificate and install it for you.
- Once the SSL certificate is installed, you’ll want to crawl the website to ensure that all internal references to HTTP on the website have been move to HTTPs. Some web hosts will make the necessary changes and updates–but many will not. That’s where a website crawler, such as Oncrawl, is very helpful.
As someone who has literally done hundreds of migrations from HTTP and HTTPs over the past several years, and someone who is typically consulted when they go wrong, there’s typically one main mistake that’s made. Typically, the websites aren’t fully migrated from HTTP to HTTPs. The migration isn’t completed. For example, the pages on the site may resolve when you type in https://www.yourdomain.com in a web browser, but the links on the website still point to the HTTP version. The images on the website may be referenced via the HTTP version, which would cause a “broken lock” symbol to appear in the web browser when you visit one of those pages.
When migrating a website from HTTP to HTTPs, it’s critical that the domain migration be completed fully. Installing an SSL certificate on the website isn’t enough. That’s just the start of the entire migration process. Before you even start moving to HTTPs from HTTP, complete these tasks:
- 1. Ensure or update all the internal links on the site so they point to HTTPs
- 2. Review and double-check the CMS settings (i.e., WordPress settings, etc.)
- 3. Update the image references and script references, such as .CSS files and JavaScript files. Any internal URL that’s referenced in the site’s code must be changed from HTTP to HTTPs. This includes canonical tags on the site.
- 4. Crawl the site with a website crawler such as Oncrawl to verify the internal references and internal links have been updated. You will need to use Oncrawl’s URL list mode in order to crawl the URL list.
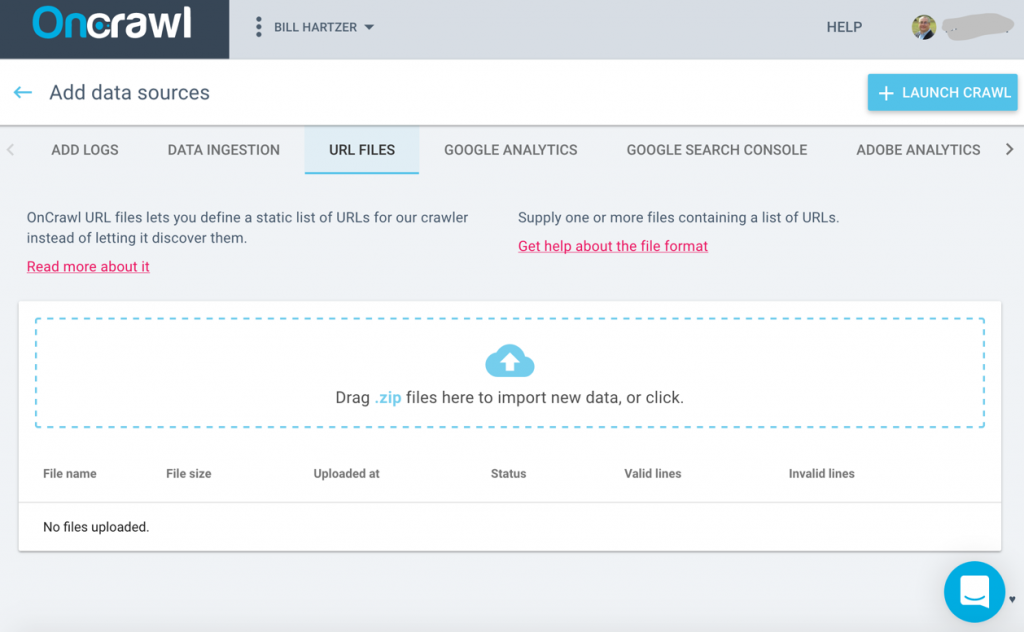
Set up a new crawl, add Data Sources to the crawl. Then, click the URL Files tab to upload the file list of URLs.
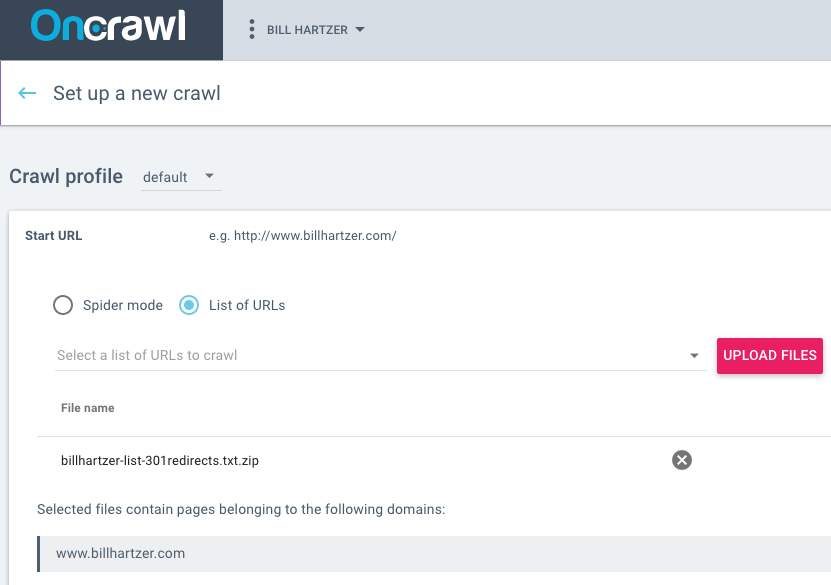
In this case, I selected the “List of URLs” option and added the URL list of 301 redirects that I have already added to my .htaccess file. I add those URLs in a text file that I then compressed into a .ZIP file.
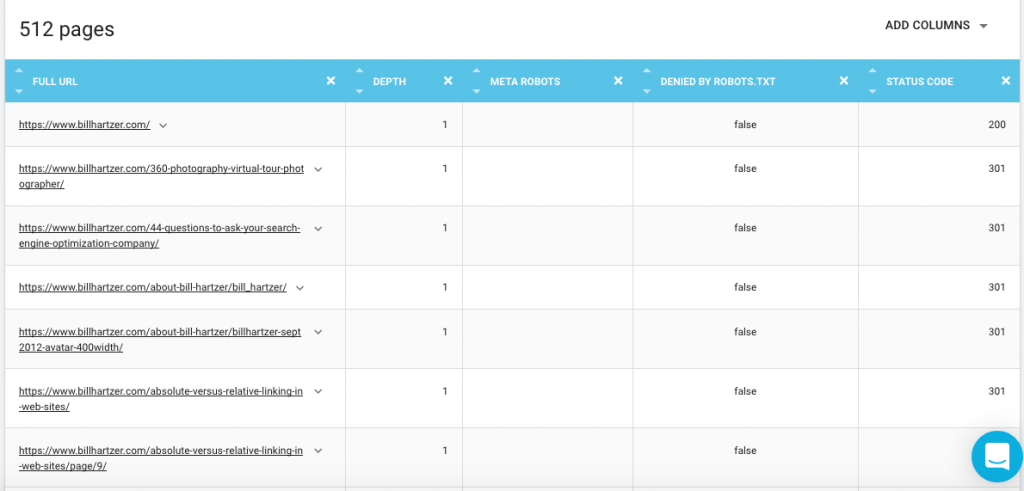
Once you run the crawl and it’s complete, you should be able to go to the Data Explorer and view the redirects to make sure that they’re all showing at 301 Permanent Redirects. Below is an example of the data that I ran for redirects that I have set up on my domain from the migration of some content over to another domain.
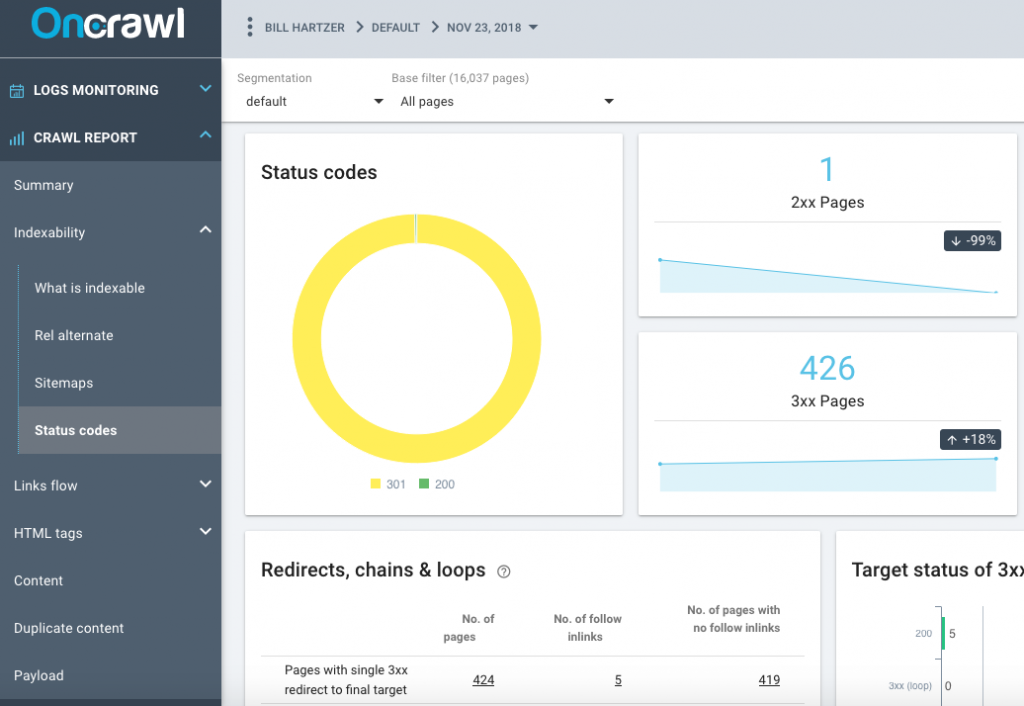
You can also see an overview of this data in the Status Codes report:
You can find more information about the list mode and how to run it here.
- 5. Set up 301 Permanent Redirects from HTTP to HTTPs.
Your site generally shouldn’t rely only on the 301 Permanent Redirects being set up. If you don’t update the internal links on the site, for example, then internal links will cause 301 redirects–which is not a good thing. When you crawl the site from the site’s home page, you should not encounter any redirects or 404 errors. The redirects should still be in place, as you’re telling everyone (search engines and visitors) that you’ve moved from HTTP to HTTPs URLs on your site. And, you’ll want to redirect clicks from links on other websites that are still pointing to the HTTP version of your website. But, clicking on a link on your site that points to another page on the site shouldn’t cause a redirect. You have control over your site, and it’s a general part of the overall maintenance of your website.
Hopefully when you get to this point, you’re ready to make the switch to HTTPs. For most domain migrations, once the SSL certificate is in place on the website, especially on a WordPress site, I go ahead and make the switch–updating all the internal references to HTTP, and updating the WordPress settings (Settings/General) to tell WordPress about the new HTTPs URLs.
- Make a backup of your website.
- In WordPress, update the General Settings (settings/general) so the WordPress Address and the Site Address point to the HTTPs version of your website.
- Use the Better Search and Replace plugin to search for the http version of your site and replace it with the https version of your website. I prefer to search for the full URL, such as http://www.yoursite.com/ and replace it with https://www.yoursite.com/ so that it makes the proper changes to the URLs. This plugin allows you to search the entire WordPress database and make the proper updates on the whole site.
- Add the redirect code in the site’s .htaccess file so that it redirects HTTP to HTTPs. Alternatively, there are plugins that will help you force HTTPs across the website, redirecting HTTP to HTTPs.
- If you use a CDN such as Cloudflare.com, you can update the settings to force HTTPs there, as well.
- Consider getting on the HSTS Preload List for Google Chrome. Run the site through https://hstspreload.org. If you have all the settings correct, it will allow you to submit to this list. If there are still issues with the settings, the site will let you know, so you can fix them.
- Update Google Analytics settings so that it knows that you’re now using HTTPs and not HTTP.
- Update your email signature, social media profiles, and any other links pointing to your website, as well.
After you move, be sure to verify all versions of your site in Google Search Console. For most sites without custom subdomains set up, there are four different versions that should be verified:
https://
https://www
http://
http://www
You should generally see the traffic to the ‘other versions’ that you’re not using, drop off, and the traffic to the main HTTPs version that you are using will start to go up (from no traffic) once you’ve successfully moved the site to HTTPs. Google representatives have said that as long as you’re redirecting properly from HTTP to HTTPs, you won’t have any ranking issues, as the migration is done correctly. What I see, though, time and time again, is that websites fail to complete all the necessary steps in an HTTP to HTTPs migration–and that’s where search engine rankings and traffic tends to drop dramatically. Moving to HTTPs has its benefits, and is a search engine ranking factor, as long as it’s done correctly.
Moving from One Domain to Another
Another type of domain name migration that happens more often than you think is a migration where you move from one domain name to another. A typical scenario would be when you have a long domain name, or one that’s using a TLD (Top Level Domain) that’s not ideal. You then see a better domain name, perhaps it’s shorter or simply better: it’s a new gTLD domain name that contains your keywords. You buy that new domain name, planning on moving your current site to that newly acquired domain name. Domain migrations like this don’t have to be scary, whereas you’re afraid that you’ll lose traffic and search engine rankings when you move to another domain name.
So, you’re switching domain names—and moving to another domain name. Let’s go through the steps that will ensure a smooth domain migration.
First, realize that there are generally two different scenarios here:
- You buy or acquire a domain name that was previously registered. This could be an expired domain name, one you purchase at a domain auction or from a “drop catcher”, or one you buy directly from someone else.
- You buy a brand new domain name that has never been registered before. Ever. Check this by looking at the Internet Archive (wayback machine) at www.archive.org.
It’s extremely important the you understand the differences between these two scenarios. So important, that the former status of the domain name could have a huge impact on the future use of that domain name. For example, if the domain name was registered at any time in the past, it could potentially have a checkered past:
- it could have good (or bad) links pointing to it
- it could have been a former off-topic site that’s on a different topic than what you’re going to use it for
- it could have been used for spam (had spam content on it or been used to send email spam)
- it could be banned on social media (yes, it’s possible to get a website banned on Facebook!)
- it could be banned in the search engines.
In most cases, it’s possible to get a domain name with a checkered past cleaned up. But not without a lot of effort. What I recommend is that if the domain name was registered at any point and used for a website, you should set it up as a microsite with on-topic content. The content on it should be on the same topic that you’re eventually going to be using it for or redirecting/moving other content to it. Let that microsite (at least 3-5 pages) sit for a few weeks (or longer) to ensure that it’s OK to use. Make sure it gets indexed in the search engine results and there aren’t any issues with it. That way when you do move it or migrate your content to it from another domain name there won’t be any baggage or issues you didn’t know about. Do your due diligence on the domain name or hire someone with experience in this area to check out the domain name. Verified Domains also provides a full domain name background check.
If the domain name has not been registered before and has never been used for a website, then you’re in luck—you shouldn’t have to worry about pre-existing issues with the domain name. I’d still do some due diligence, just to make sure, though.
If you’re comfortable with the domain name that you’re migrating to, then the first order of business is to get very familiar with all of the content on the existing site and find all of the potential URLs that ever existed on it. For example, a full crawl of the website using Oncrawl should be done, including:
- Log file data
- Google Analytics or Adobe Analytics data
- Google Search Console data
- Majestic.com Backlink data
Including all of these in the Oncrawl crawl will ensure that you find all of the URLs on the site that ever existed. This way, any redirects that you set up (redirecting the old domain name to the new one) will take into account all of the potential traffic and links that the old domain name ever had.
The actual process of moving from one domain name to another is, in fact, fairly simple and includes a few steps:
- 1. Verify all versions of each site in Google Search Console. This means the http://, https://, http://www, and https://www versions. Identify all of the subdomains, as well, if there are any that you know of.
- 2. Crawl the site entirely using Oncrawl. Include Google Analytics, Google Search Console, Majestic.com, and log file data in your crawl, if possible. You want to crawl so that you identify all possible URLs. Make a list of all of the URLs you encounter, one massive list of unique URLs. You’ll need them later.
- 3. Set up the redirects. Use 301 Permanent Redirects to redirect from the old domain name to the new version on the new domain. Ideally, this means redirecting from each version on the old domain name to the new domain.
- 4. Test the redirects and make sure that you’re not redirecting multiple times. For example, there should be one 301 Permanent Redirect from http://www.olddomain.com to https://www.newdomain.com/. It shouldn’t redirect from http://www.olddomain.com to https://www.olddomain.com and then to https://www.newdomain.com/. It’s easy to make this mistake—and it is a mistake. Make sure that it’s only 1 redirect, not multiple redirects.
- 5. Use the Google Change of Address tool to tell Google that you’re moving from one domain name to another. If the redirects are set up properly, Google will confirm it using that tool.
- 6. Update the Google Analytics settings to point to the new domain name. If you want to keep the old historical data in Google Analytics, then you’ll need to edit the URL in the Google Analytics settings.
- 7. Crawl the site again, using the list you previously created, to ensure that all of the old URLs are redirecting properly to the new URLs. Use Oncrawl’s URL list mode to crawl the URL list you previously created.
Set up a new crawl, add Data Sources to the crawl. Then, click the URL Files tab to upload the file list of URLs.

You can find more information about the list mode here.
You’ll need to keep the redirects in place for a long time—I typically recommend that you don’t ever remove the redirects from the old domain name to the new domain. The old URLs will remain in Google’s index for a long time—I’ve seen them stay for at least 3 years if the redirects are still in place. The old domain will only show up in the search results if you search for the old domain name, and you shouldn’t see the old domain ranking for any keywords if the redirects are in place and set up properly.
Combining Websites Into One Website
There are times when you’ll come across the situation when you need to combine the content from multiple websites into one website. Many of the steps in the process of combining content and moving content are the same—but it is typically only more difficult when deciding which content to move, which content to redirect, and which content to completely remove from the website (and not move).
The steps I recommend when combining two websites or multiple website into one website are the following:
- 1. Crawl all of the websites using Oncrawl. Include Google Analytics, Google Search Console, Majestic.com, and log file data in your crawls, if possible. You want to crawl so that you identify all possible URLs. Make a list of all of the URLs you encounter, one massive list of unique URLs. You’ll need them later.
- 2. Create a spreadsheet with all of the URLs in all websites. This may involve multiple tabs, one for each website, and one for the “new” website you’re creating. Start the tedious process of listing all the pages on the “new” website and mapping out which pages from the old websites you’re moving, which pages you’re combining, and so forth. This is the most critical part of the entire process, and you should spend the most time on this task.
- 3. Once you have a spreadsheet and lists of which URLs need to be redirected and what content needs to be moved or combined, make a plan for combining the content and a plan for moving the content. This will, of course, include navigational changes (changes to internal links) which you’ll need to map out, as well. Keep in mind that it’s recommended that you keep as many URLs the same as possible. If you’re combining websites into one existing website, it’s helpful to keep the same URLs.
- 4. During this process, I recommend starting with a brand new web server or VPS, typically in a development environment (not a site open to the public and crawlable by the search engines). This will give you enough time to move the content, add the internal links, and update the navigation. Some like to use this time to create a new website with a new web design, as well. Move the content and update the new site.
- 5. Once you’re happy with the new site and the content that’s moved or combined, you can begin to set up the redirects. Use the spreadsheet you created previously to help with the redirects—as well as the previous Oncrawl crawl data, as well.
- 6. Make sure all versions of all domains (http://, https://, http://www., and https://www, as well as any subdomains, are verified in Google Search Console.
- 7. Set up the redirects, allow the search engines to crawl the new site. If you’ve changed to a different web server, you’ll need to update the domain’s name servers in order to have them point to the new web server.
- 8. Use the Google Change of Address tool to tell Google that you’ve moved from one domain to the other. You’ll need to do this for each domain that you’re moving or combining. If the redirects are set up properly, Google will recognize the move when you’re setting up the Change of Address.
- 9. Update the Google Analytics settings to point to the new domain name. You may not be able to keep all of the historical Google Analytics data, as you’re not moving just one domain to another. You may want to start a new Google Analytics account for the new domain or new site—or just use the one that’s on the current site.
- 10. Crawl all of the sites again, using the list you previously created, to ensure that all of the old URLs are redirecting properly to the new URLs. Use Oncrawl’s URL list mode to recrawl all of the URLs to verify the redirects.
Set up a new crawl, add Data Sources to the crawl. Then, click the URL Files tab to upload the file list of URLs.
You can find more information about the list mode here.
- 11. For new content that you’ve moved or updated, you may want to use the Google Fetch and Render tool to request that Google recrawl the site.
Whether you’re migrating from HTTP to HTTPs, migrating from one domain name to another, or combining websites into one website, they all require a website crawl. Use crawls to find all of the possible URLs (pages) that ever existed on a website, and use that data when setting up redirects. It’s imperative that you use 301 Permanent Redirects, while minimizing the number of total ‘hops’ a visitor (or search engine bot) must go through to get to the final location. Too often I see search engine ranking problems and traffic drops because of bad site migrations, or migrations where all the necessary steps weren’t followed. With a good plan for the migration, understanding the full process, and checking the migration afterwards, your next domain migration can go smoothly, without a loss of traffic or search engine rankings.
Request your custom demo