
Diagnosing SEO problems with a site’s JavaScript implementation is not always easy. When you opt for Server Side Rendering or Pre-rendering for bots, the task can become even more complex.
You have to make sure that the version served to the Google bots is complete, that all the javascript elements have been executed on the server-side and are present in the html crawled by the bot.
In this article, we will see how to quickly and easily test your JS rendering of all your pages using Oncrawl.
SEO and JS
Before starting with the practice, let’s quickly go over the interest in SEO of Server Side Rendering (SSR) and Pre-rendering of javascript elements of a site.
JS and Google: good practices
By default, the HTML rendering of javascript is done by the client, i.e. your web browser. When you request a page containing JS elements, it is your browser that executes this javascript code to display the complete page. This is called Client-Side Rendering (CSR).
For Google this is a problem because it requires a lot of time and especially resources. It forces it to go through your page twice, once to retrieve the code, then a second time after rendering the HTML of the JS.
As a direct consequence of the CSR for your SEO, the complete content of your pages will not be visible immediately by Google and therefore it can delay the indexation of them. Moreover, the crawl budget that is granted to your site is also affected because your pages need to be crawled twice.
The SSR (server side rendering)
In the case of SSR, the HTML rendering of the javascript is done on the server-side for all the visitors of the site, humans and bots. As a consequence, Google does not need to manage the content in JS because it gets directly the complete html at the time of crawl. This corrects the defect of javascript in SEO.
On the other hand, the cost of resources to achieve this rendering on the server-side can be important. This is where the third option comes in, pre-rendering.
Pre-rendering
In this hybrid configuration, the execution of the JS is done on the client-side for all visitors (CSR) except for the search engine bots. A pre-rendered HTML content is served to Google bots in order to keep the SEO advantages of SSR but also the economical advantages of CSR.
This practice which at first sight could be considered as cloaking (offering different versions to bots and visitors of a web page) is in fact an idea of Google which is highly recommended. We can easily guess why.
How to test Javascript rendering with Oncrawl?
There are many ways to diagnose SEO errors in JS implementation. By using Oncrawl you will be able to test all of your pages automatically without having to do any manual comparisons.
Oncrawl is able to crawl a site by running javascript on the client side. The idea is to launch two crawls and generate a comparison between :
- A crawl with JS rendering enabled
- A crawl with JS rendering disabled
Then to measure through several metrics the differences between these two crawls, signs that part of the javascript is not executed on the server-side.
Note that in the case of pre-rendering the second crawl should be done with a Google user-agent in order to crawl the pre-rendered version of the site.
This test can be done in three steps:
- Create the crawl profiles
- Crawl the site with each profile and generate a crawl over crawl
- Analyze the results
Create the crawl profiles
The profile with JS
From your project page, click on “+ Set up new crawl”.
This will bring you to the crawl settings page. Your default crawl settings are displayed. You can either change them or create a new crawl configuration.
A crawl profile is a set of settings that has been saved under a name for future use.
To create a new crawl profile, click on the blue “+ Create Crawl Profile” button in the upper right corner.
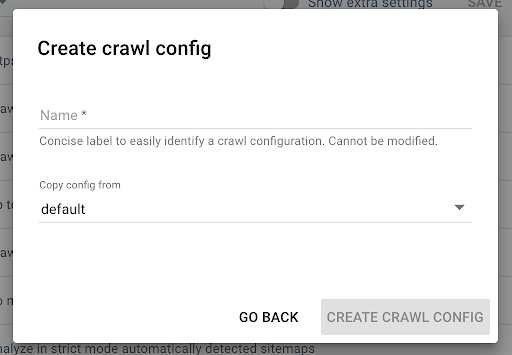
Name it “Crawl with JS” and copy your usual crawl profile (the Default for example).
To activate the JS on this new profile, you have to display the additional parameters which are hidden by default. To access them, click on the “Show extra settings” button at the top of the page.
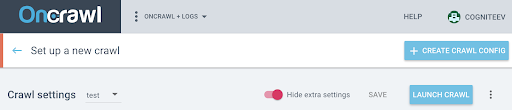
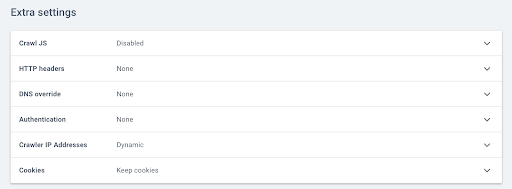
Then go to the Extra settings and click on “Enable” in the Crawl JS option.
Note: Remember to adapt your crawl speed to the capacity of your site’s servers, as Oncrawl will make many more calls per URL in order to execute the elements in Javascript. The ideal speed is the one that your server and site architecture can best support. If Oncrawl’s crawling speed is too fast, your server may not be able to keep up.
The profile without JS
For this second crawl profile, follow the same steps and uncheck the JS enable box.
Note: it is important to have two profiles with an identical scope for the comparison to be meaningful.
If your site is in Server Side Rendering, go to the next step.
If your site is in pre-rendering based for Google bots, you should send us a request to modify the User Agent for the crawl. Once the profile is created, send us a message via Intercom directly in the application so that we can replace the Oncrawl User Agent with a Google bot User Agent.
Request your custom demo

Launch your crawls and generate a Crawl over Crawl
Once the two profiles have been created, you just have to crawl your site with these two profiles in turn. To make it easier, you can use the crawl programming function.
Schedule a crawl
- On the project page, click on the “Scheduled crawls” tab at the top of the crawl tracking box.
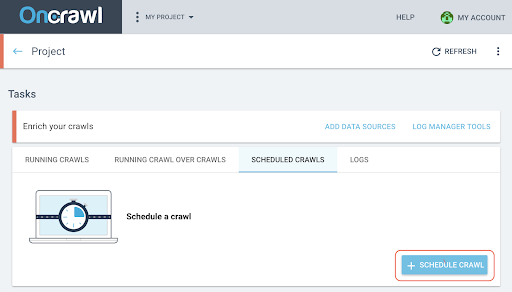
- Click on “+ Schedule crawl” to schedule a new crawl.
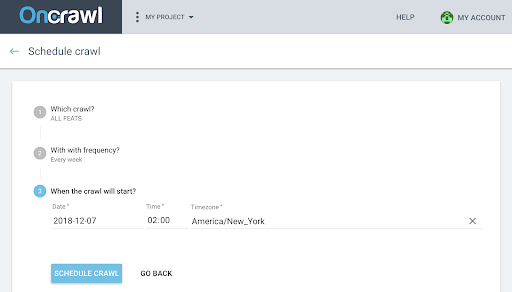
- You will then need to choose:
- The crawl profile you want to use for the future crawl
- The frequency to repeat the crawl, choose “Just once”.
- The date, time (in 24 hour format) and time zone (by city) of when you want the crawl to start.
- Click on “schedule crawl”.
Once both analyses of your crawls are available you need to generate a crawl over crawl.
Generate a Crawl over Crawl
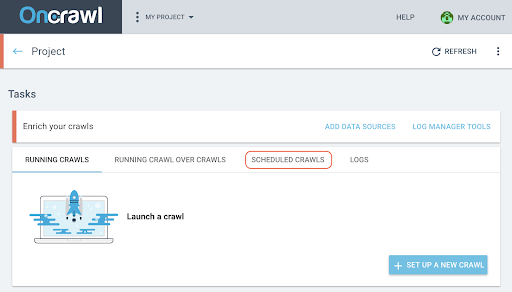
- From the home page of the project, launch a crawl over crawl:
- Under “Tasks”, click on the “Running Crawl over Crawls” tab.
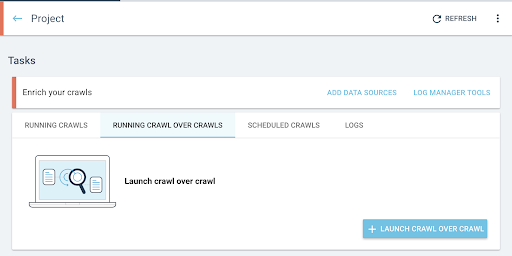
- Click on “+ Start crawl over crawl”.
- Select the two crawls you want to compare.
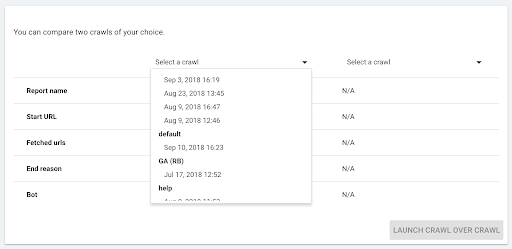
When you click “+ Run Crawl Over Crawl”, Oncrawl analyzes the differences between the two existing crawls and adds the Crawl Over Crawl report to the analysis results of the two crawls.
You can follow the progress of this crawl over crawl in the “Start crawl over crawl” tab on the project homepage. As the crawl is already finished, the over crawl will skip the “Crawling” state and start directly with “Analysis”.
Analyze the results
Go to the crawl over crawl report on the following three views:
- Structure
- Content
- Internal linking
You can also download our custom dashboard.
Which metrics to look at?
Page crawled, Average word count per page and Average text to code ratio
The first indicator Page crawled shows you immediately if the two profiles have crawled the same number of pages.
If the difference is not significant, you can check two on page indicators:
- Average word count per page
- Average text to code ratio
These two metrics will highlight a difference in html content with or without javascript execution on the client side.
If there are less words per page on average, it means that part of the page content is not available without JS rendering.
Similarly, if the text to ratio is lower, it means that some of the page content is not available without JS rendering.
The text to code ratio measures how much of a page’s content is visible (text) and how much is encoded content (code). The higher the percentage reported, the more text the page contains compared to the amount of code.
Depth, Inrank and Inlinks
You can then look at the metrics related to your internal mesh that are more sensitive. That a small part of the page content is not available without JS rendering is not necessarily problematic for your SEO, but if it impacts your internal mesh, the consequences on the crawlability of your site and the crawl budget are more important.
Compare the average depth, the average Inrank, the average number of Inlinks and internal outlinks.
An increasing average depth, a decreasing average inrank and a decreasing average number of inlinks and outlinks are indicators of the existence of mesh blocks managed in JS not pre-rendered on the server side. As a result, some of the links are not immediately available to the google bot.
This can have consequences on all or part of your site. It is then necessary to study these modifications by group of pages to identify if some types of pages are disadvantaged by this javascript mesh.
The data explorer will allow you to play with the filters to highlight these elements.
Go further with the data explorer and the URL details
In the data explorer
When you look at the Crawl over Crawl data in the data explorer, you will see two columns of URLs: one for the Crawl 1 URLs and one for the Crawl 2 URLs.
You can then add each of the metrics mentioned above (crawled pages, wordcount, text to code ration, depth, inrank, inlinks) twice each to display the value of Crawl 1 and Crawl 2 side by side.
By using the filters you will be able to identify the URLs with the largest differences.
URL details
If you’ve identified differences between the SSR and/or Prerendered version and the client-side rendered version, then you’ll need to go into more detail to understand which JS elements are not optimized for SEO.
By clicking on a page in the data-explorer, you switch to the URL details and you can then view the source code as seen by Oncraw by clicking on the “view source” tab.
You can then retrieve the HTML code by clicking on Copy HTML source.
At the top left, you can switch from one crawl to another to retrieve the other version of the code.
By using an html code comparison tool, you can compare the two versions of a page, with JS and without JS executed on the client side. For the rest, it’s up to you!